Wizard
When your computer is connected to the GIS unit for the first time, you need to start the setup process.
To complete the setup process you will need to open your web browser, you may be automatically redirected to the GIS unit wizard if not please go to http://aplogin.com
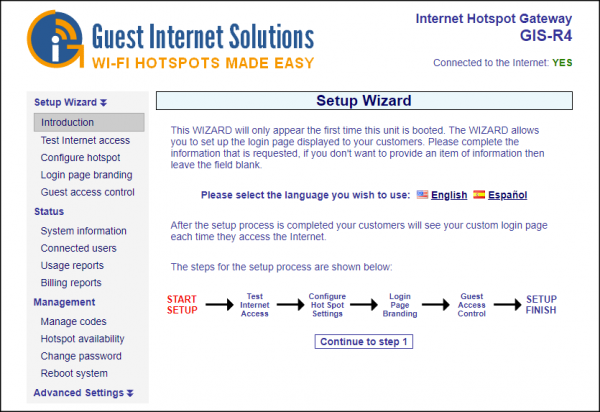
Before you start the setup process, you need to choose the system language (English or Spanish).
The system setting is used as a global setting for all users when they first connect to the gateway. A single admin user can change the language for their browser by clicking on the flags that appear at the bottom of the menu on every page (except the wizard intro page). Once the language is changed, a cookie is set. That user will always see the GUI pages in the chosen language (even if system language is different).
The individual vs global language setting means that different users can use the same gateway in different languages (try it with Firefox and Chrome connected to the same gateway).
The setup process has four steps:
Step 1
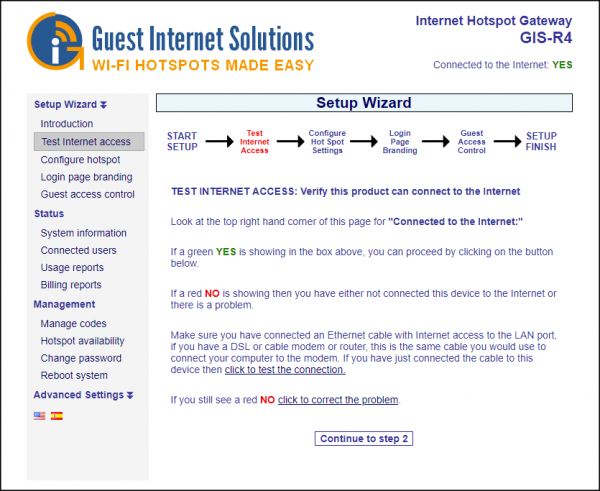 The TEST INTERNET ACCESS setup page verifies that your Guest Internet gateway product is connected to the Internet. The setup process cannot be completed without an Internet connection.
To check if you have an internet connection look on the top right hand corner of the browser window:
You will see a green YES or a red NO.
If you have a green YES then your product is connected to the Internet and you can proceed to the next page by clicking on the button ‘Continue to Step 2’.
If you see a red NO then you have a connection problem. To resolve try the following steps:
- First verify that your modem/router provides a good Internet connection by connecting a computer directly to the modem/router using an Ethernet cable.
- Next verify that the Guest Internet product is connected to modem/router and then click on ‘click to test the Internet connection’.
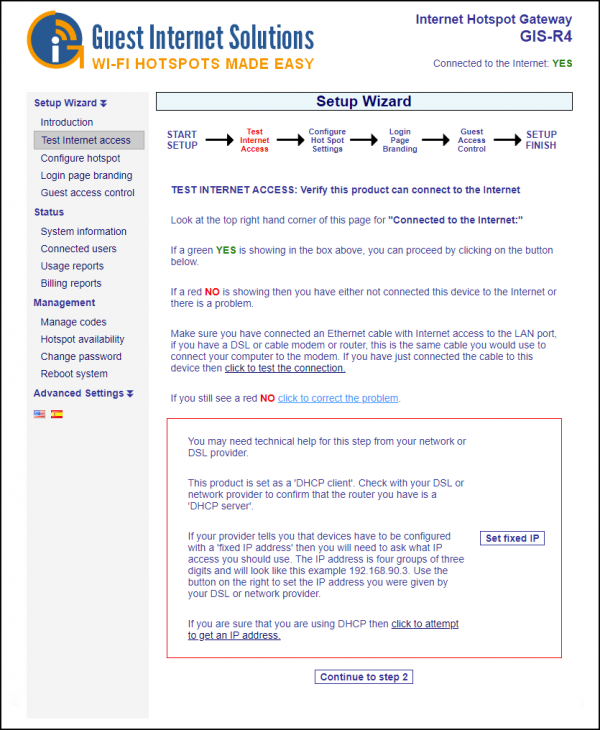
- If the Internet status still shows a red NO then click on ‘click to correct this problem’.
- Verify that your router is a ‘DHCP server’. Click on the link ‘click to attempt an IP address’. If you require a static IP address for your Internet connection you can do this by clicking 'click to correct the problem'.
- If you still have a red NO after trying the steps described please contact Guest Internet support.
Step 2
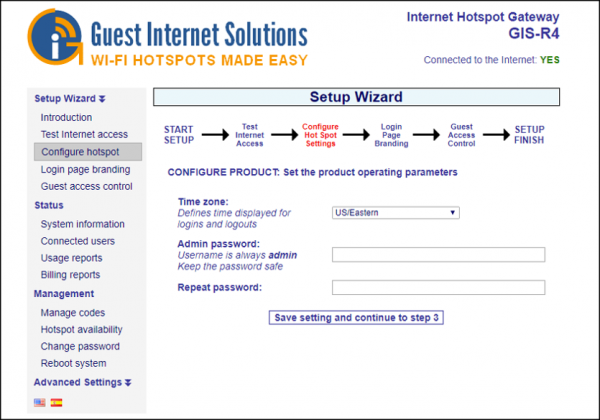 The GIS-gateway synchronizes with Internet time and date to time access codes and provide the data and time for the usage log. It is necessary to first select the time zone for the gateway. Click on the arrow at the right of the box to see the drop down menu. Select your time zone from this list. The default time zone is US eastern time.
The GIS-gateway has no default administrator password. The administrator access password must be entered in the box.
Guest Internet products can only be operated when a unique password has been entered, following the recommendations of the Payment Card Industry Data Security Standard (PCI - DSS).
Create a ‘strong’ password using the following rules:
- The password should be at least 8 characters
- Don’t use words that are in the dictionary
- Include capital letters, numbers and punctuation marks in the password.
When you have completed this step click on the button to proceed to step 3.
Step 3
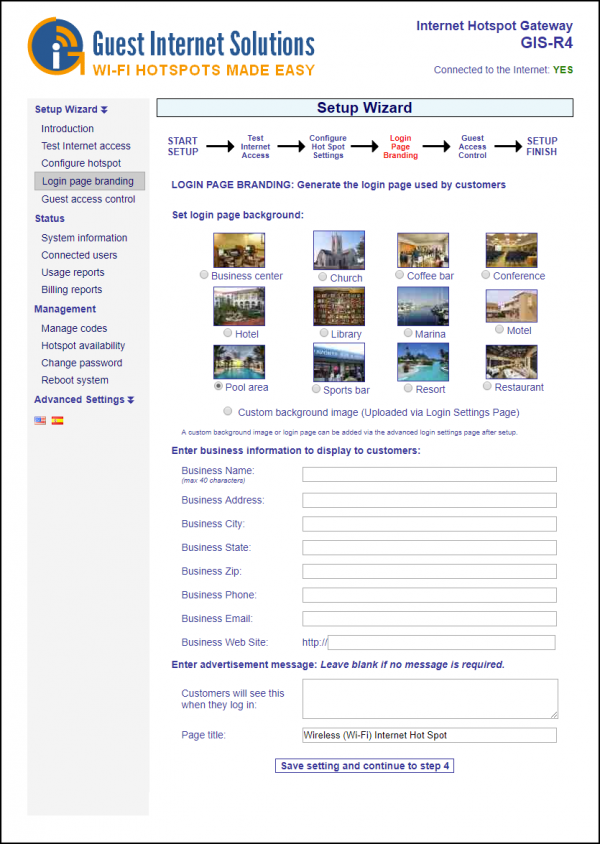 The next step in the setup process is the creation of the login page. Your guests will see this page when they connect to your Internet service.
You can use one of our twelve Login pages, upload an image with your branding for the background or create a new Login page with HTML, CSS and JavaScript.
The types of Login Page are explained in details in the Custom Login Pages section.
Step 4
The next step is to select the type of access control you require.
 You have two options.
- Unlimited access: The guest sees the login page and has to click on the disclaimer button to get Internet access.
- Controlled Access: The guest has to type in an access code. The code is generated using the manage codes menu option and can be given or sold to the guest.
The choice you make here is determined by the way that you want to offer your Internet service for your guests. You can read more about Login Page Type by clicking here.
It is also necessary to type a message that tells your customer how to proceed to get Internet access. Explained in Login Messages.
When completed click on the save settings and finish wizard button, you then need to reboot the Guest Internet gateway unit.
This will restart the gateway unit with all the parameters that were entered during the setup process.
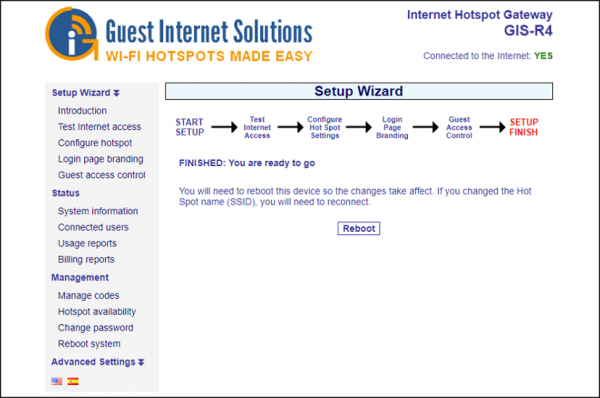 When the setup process is completed your personalized wireless Internet service will be ready for your guests to start using.