Printer Setup
The ticket printer GIS-TP1 is used to print access codes for a point of sale station in Internet Cafes or for user businesses, such as a hotel concierge desk, or a trade show management desk.
The GIS-TP1 connects to the gateway LAN port via an Ethernet cable connected to a switch. The printer uses standard 58mm thermal paper widely available for point of sale terminals.
The GIS-TP1 ticket printer can be operated using a personal computer or laptop.
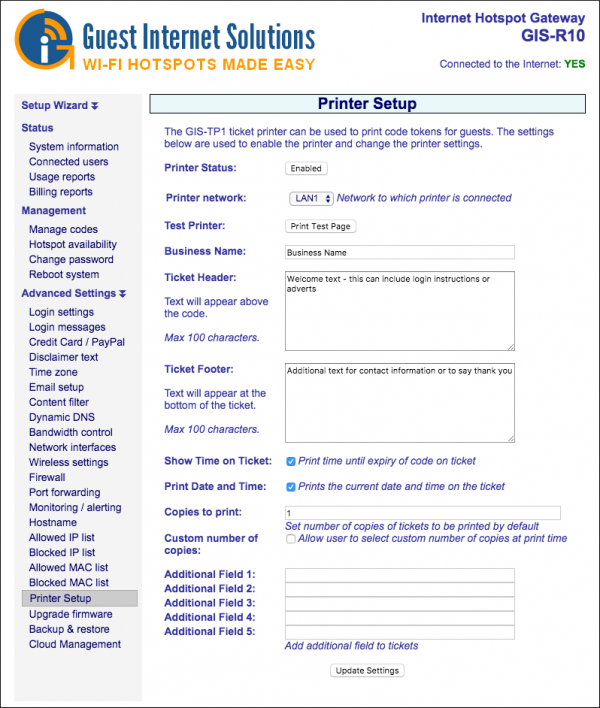 When the configuration page is first opened the printer status will be shown as disabled. You need to:
- Click on the printer status enable button to enable printing.
- Type the messages that will be displayed before the access code on the ticket:
- the business name
- the ticket header text
- The ticket footer text is printed below the access code.
- A check box selects the option to print the duration of the access code and below that another checkbox selects the option to print the current date and time.
- Additionally, you can either type the number of copies or select the option thar allow user to select custom number of copies at print time.
- Finally, you have 5 additional fields, where you can enter any other useful information to be printed on the ticket.
You need to ensure that a CODES password has bee set in the Change Password section.
Open the browser, instead of the home page, the login page will be displayed. Now type the following into the browser URL line: aplogin.com/codes
A box will open requesting the username and password.
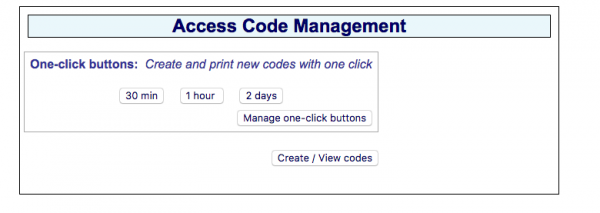 Up to ten ticket printer buttons can be configured for the tablet display. Each button represents the duration of an access code, and can also represent the cost of the ticket.